Thursday 31 July 2014

WWII British Warplane (Wonky Spitfire?), Grafix

The elliptical wing design of the Spitfire fighter plane is probably the most recognisable silhouette of the any aircraft ever build. So with this in mind quite how Grafix, the manufacturer of this model kit, managed to screw this one up is a somewhat of a puzzle to me. 
Box art - a promising start
Grafix does state somewhere that the model is based on the Spitfire, arguably the most famous and recognisable fighter of WWII. The box art, shown above, would indicate that quite a detailed model was enclosed but having made the Mustang model from the same company I was expected a relatively simple kit. Once I started to make the kit I noticed something was obviously wrong with the wings - as you will hopefully be able to see from the photos. 

Mmm..there's something not quite right with this.
Because the way the wings (solid one piece casting) are made, with asymmetric fitting lugs and holes, it is only possible to fit them as shown but didn't stop me from initially thinking I was going mad, "Surely this can't be right" I thought "the wings can't have been made backwards? can they?"

Whoops
As the kit is so simple, less than a dozen parts, I didn't initially look at the instructions but when I fished them out of the box I realised someone at Grafix had made an awful error. The wings are definitely modeled on backwards. Even the instruction sheet shows the wrong profile.
You may also notice if you read the instructions that they have even managed to get this wrong as well. If you follow the instructions to the letter you won't be able to fit the propeller properly to enable it to spin, which as every schoolboy knows is the only way to make a model. I would have loved to have been a fly-on-the wall at Grafix when someone pointed out the design mistake.

As I was laughing too hard to complete the model I decided to stop it there. I may try and convert it into a retro sci-fi fighter but that will be a project for the future.

Unlike the Mustang piece I previously made, which is quite acceptable in terms of shape, this is sadly a missed opportunity for a perfect pocket money model of a Spitfire.

Wednesday 30 July 2014

WWII American Warplane (Mustang), Grafix

I picked up this particular model from The Works, a well known store here in the UK but perhaps best know for selling discount books, for the bargain price of 99 pence. Occasionally if you have a rummage about you can find something of interest. They are also currently stocking Revell's - Mistel V Ta154 And Fw190 kit for an absolute bargain £20.
Miss Yelma
The model itself is based on the famous WWII American fighter the North American Mustang.
Box Art (and a bargain)
As you will see from my (now traditionally very poor) photos the kit is very basic, in fact the entire model consists of a grand total of ten parts. I'm guessing the model is built to approximately 1/72 scale although there is no mention of this anywhere on the box or on the instruction sheet (although why anyone would need instructions is a puzzle as the parts will only fit together in one way).
1st sprue
2nd sprue
Strange 3D decals
Using the powers of Google All Hail' Images I was able to find the actual plane the cover art was based on (the North American TF-51D Mustang 44-84847, Miss Velma, (N251RJ) to be precise).

As with the plastic cowboys this kit was bought on impulse (well, it was only a pound) and which I had only bought out of curiosity to use it as a desk ornament. However after making the kit I wondered if I could paint the model to a reasonable standard to enable me to use it in Bolt Action games along side my other 'proper' models i.e. ones made by Airfix and Revell.

As I had already glued the wheels/landing gear in place, in order to match the other Bolt Action planes, I removed the wheels with side cutters and superglued a small magnet to the underside of the model. As the mould line ran straight down the middle of the cockpit I applied liquid poly cement to the join and then sanded it down. I repeated this a number of times until I was happy with the result. 

After taking a look at the oddly designed decals, I decided to hand paint my own onto the plane as the originals are drawn in a 3D style complete with added shadow detail. Very odd as it's easier to produce a flat (and more accurate) pattern. The green & yellow checker pattern, the yellow 'go-faster strip' and the invasion strips were also painted by hand.
Completed hand-painted model
Again I'm not sure that the amount of time and effort that went into painting the kit was actually worth it in terms of the finished result but it was quite an enjoyable challenge.

Tuesday 29 July 2014

Wattle Fence Animal Pen

This piece of terrain can be used on the table top for ancients right up to the modern day (OK, it would have to be somewhere quite unsophisticated but the principle remains).
The base is made from a small off cut piece of MDF board from work; barbecue sticks make up the corner posts and the smaller posts in between are the ever useful cocktail sticks. This size and shape of the board isn't very important with this method so any piece of cast off material can be used to form the base. Cutting a cocktail stick into two equal halves will establish the overall height of the fence which seems to suit all of the 28mm size animals I have, such as the two porkers previously shown (here)

Mark straight lines on to the board approx 10mm (or 1/2" which is 12.7mm and close enough) which will determine the line of the fence, then equally divide this line to the spacing of the uprights. Again I used approximately a 10mm spacing which seemed to work out OK and gave a realistic enough look to the final model.

Next holes were drilled holes suitable to hold the various size uprights sticks in place. You can quite easily use the same size stick for all the uprights (although I previously found that corner cocktail sticks used in a corner tended to bend inwards under the pressure of the 'wattle'). 

Remember to leave a gap for the gateway.
Once the board and sticks have dried in position now comes the tricky bit, using plant/garden twist tie (available from any garden centre or even any decent supermarket nowadays) and starting from one corner weave the twist tie thought the uprights. Once you completed a circuit (remembering to leave a gap for the gate) return in the opposite direction and weave the twist tie through the uprights so the is now on the opposite side of the stick - hopefully the technique makes more sense when you look at the photos rather than me trying to describe the process.

As you weave the twist tie around the uprights you will have to push the tie down into position as it does tend to 'ride up' in places. Once happy with the number of horizontal passes I then painted the whole assembly with PVA glue to secure everything into place.
The gateway is simply made from more cocktail sticks and coffee stirrers and secured into position with twisted copper wire to give the impression of rope.

Obviously exactly the same technique can be used to create single wattle fences.
Very nice (and cheap) plastic wattle fences in two fixed lengths are available to buy from Renedra Ltd. However using the method described above you can make any size and shape enclosed area you wish. It might make a while to make but it is always very satisfying to make you own terrain.

Monday 28 July 2014

Row Boat, Ainsty Castings

There's not an awful lot I can say about this apart that it is a row boat from Ainsty Castings (Code: 3502) and it cost £6, purchased at the Stafford Wargames show back in June.


Gripping Beat plastic Dark Age Warrior for scale

I intend to use this in conjunction with the (Medieval Ship) one I prepared earlier. After painting this I thought I'd like to build some sort of jetty or even a harbour terrain board but this will have to wait until I have the time and inclination to make it.

Friday 25 July 2014

Two Pigs, Irregular Miniatures Ltd

These two porkers, I believe, are from Irregular Miniatures. If this is the case then I think the code from them is: AN11 (Two Pigs). The reason I'm not 100% sure these are from Irregular is because I bought these individually from a trade stand at a show quite a while ago, along with a few cattle. These have been based individually so they can be carried off as loot (bacon is so much rewarding than gold or silver).
 Once again I've painted these to represent Gloucester Old Spot breed simply because I like the look of them and they add an interesting dimension to the table top. Previous similar models can be seen (here)

Tuesday 22 July 2014

Changing the Pose of a Miniature - Modding - Bolt Action

Here's a quick video that shows how to quickly and easily modify a plastic figure, in this case a miniature from the Perry's DAK box set.

Tuesday 15 July 2014

How to Pin a Miniature to a Base

Following on the the previous video, which dealt with an issue when correcting Mantic's resin/plastic material, this video is more of a beginners guide to pinning figures to a base. 

If there are any techniques or methods that you would like to see demonstrated on Ade's channel please feel free to ask.

Tuesday 8 July 2014

Correcting Resin-Plastic 'Resnic' Miniatures

And now for something completely different:


I made this video a while ago to support Ade in his ongoing venture to turn his hobby into a full time career (which I imagine is everyone's dream), this video deals with some of the issues I found with Mantic's resnic figures, in this particular case for the Deadzone board game. Now all I have to do is paint the ugly brutes.

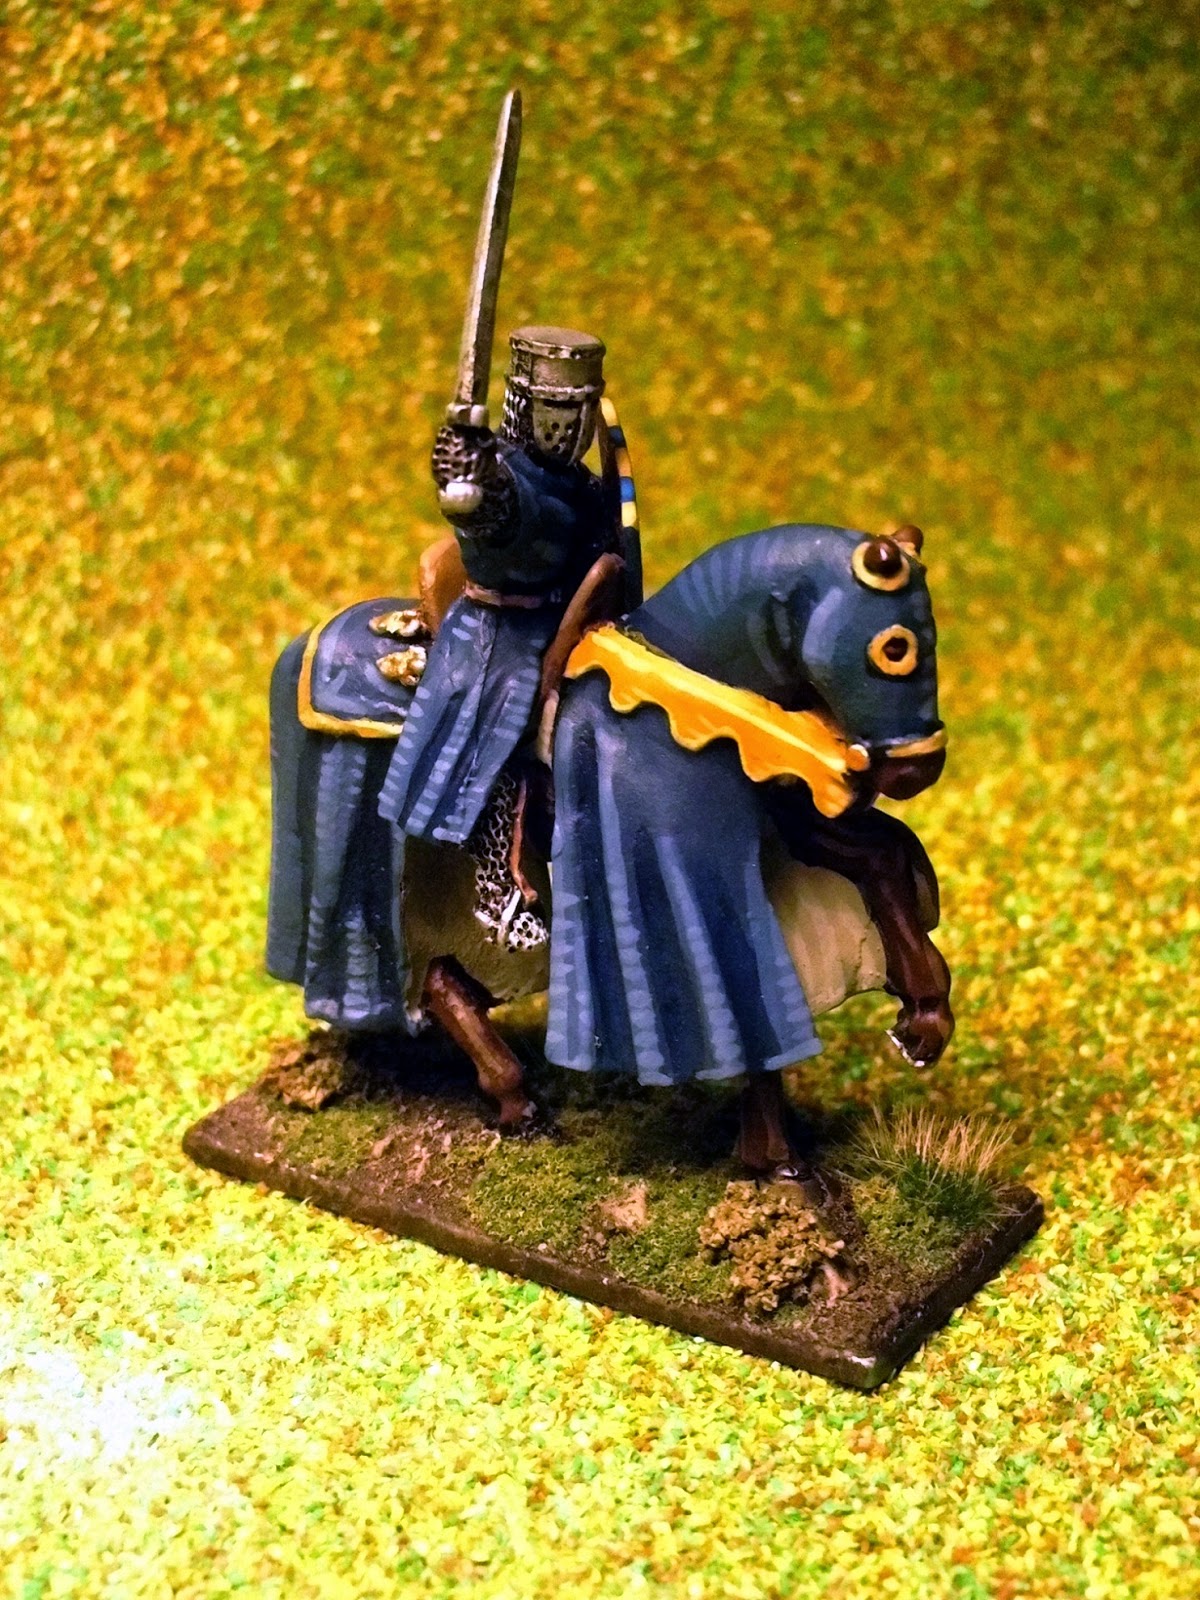
Coat of Arms of De Brian, Crusader Miniatures

As with the Wyville figure, details of which can be found (here) this model doesn't actually represent anyone in particular but the coat of arms are based on floor tiles discovered at Shaftsbury Abbey.


De Brian
Arms: Azure, three piles conjoined in base or

Elizabeth, daughter of sir Guy De Brian married Hugh, the son of Hugh Courtney, second Earl of Devon. He was the owner of the East and East Coker in Somerset.


Again I removed the tail from the horse to give a more accurate historical representation of a mounted knight.

I have to admit that I'm not overly keen on this particular model of the horse and as a result I didn't spend too much time and effort painting it. In retrospect I should have painted the heraldic pattern on the caparison as well as on the figures surcoat but I'm not going to add any more to it now.

Thursday 3 July 2014

Coat of Arms of Wyville, Crusader Miniatures & Fireforge Games

This model doesn't actually represent anyone in particular but the coat of arms is once again based on floor tiles discovered at Shaftsbury abbey, once one of the richest abbey's in the country. More information about my visit to the town and figures based on the tiles can be found (here)(here) and (here).


From the note at Shaftsbury Abbey museum:


Wyville 

Arms: A cross argent fretty between four mullets of six points.


Robert Wyville (or Wyvil), was Bishop of Salisbury from 1330 to 1375. He was involved in a quarrel with the new newly ennobled Lord Salisbury in 1341 over the ownership of Sherbourne castle. This escalated into an argument that was nearly settled through (a very rare) trial by combat. At one time he held the high office of Lord Privy Seal.

As you may notice the figure, in terms of the style of his armour etc., predates the bishop by approximately one hundred years. The most interesting aspect of this character was his near involvement in a trial by combat. This dispute was due to be settled by two champions chosen by the two main protagonists, Wyville and the Earl of Salisbury.

However before the combat was due to start one of the men (the Bishop's champion if I remember correctly) was discovered to have been 'cheating' by having magic charms and amulets tucked into his clothing so the trial was suspended. Eventually the cause was settled so the trial by combat never actually took place. It would make an interesting basis for a 'what if' scenario.


The mounted knight and the knight on foot are both from Crusader while the horse is from Fireforge Games. As you may notice this is another model I have altered slightly. I've removed the tail and filled in the gap on the barding with greenstuff. The reasoning behind this decision can be found (here).

Apologies for the quality and strange colour of the photos (just like the good old days). I got a bit carried away with editing on Picasa and didn't want to waste time altering then back.

Wednesday 2 July 2014

Special Give-away Competition Result

Last night I asked my assistant, brother Neil (who could never be accused of being glamorous), to pull the winning entry (or slip of paper) out of an actual hat. 

And The Winner Is... 

Pat G 

Congratulations Pat, it seems appropriate as yesterday was Canada Day. I'll be getting in touch with you very shortly to sort out details of how exactly you'd like your mounted knight to be painted. 

There was a bit of a rush of entries (slight exaggeration but hey-ho) on the last day. There were thirty two entries in total (which was approximately the kind of numbers I had hoped for). Seeing as I had a decent amount of entries I've also decided to give out a couple of runners-up prizes. 

The runner up prizes goes to...

Robert Hingley &
Andrew Saunders (aka Loki) 

It must have been something in the water yesterday because Robert also lives in Canada (bit of a nice coincidence). The runners up will receive a personalised miniature knight on foot. I'll be getting in touch with both to work out the details. 

Thanks to everyone for entering and don't forget I will shortly be running another competition to coincide with the launch of Lion Rampant where the lucky winner will receive another unique prize.